Wednesday, October 25, 2006

Plenty of Apples...Not Plenty of time

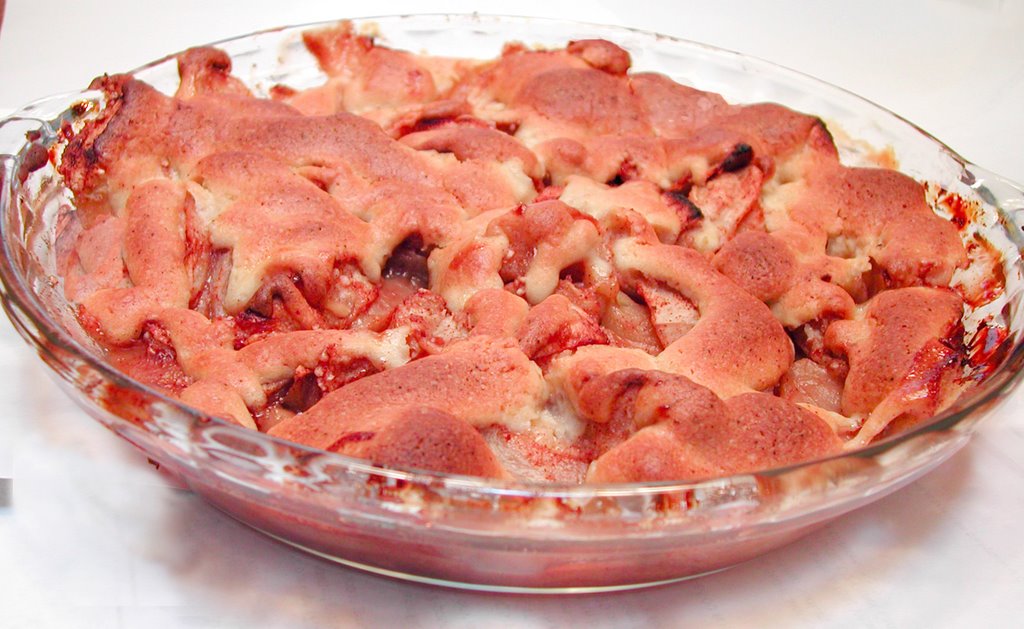
Apple Pie without the hassle!

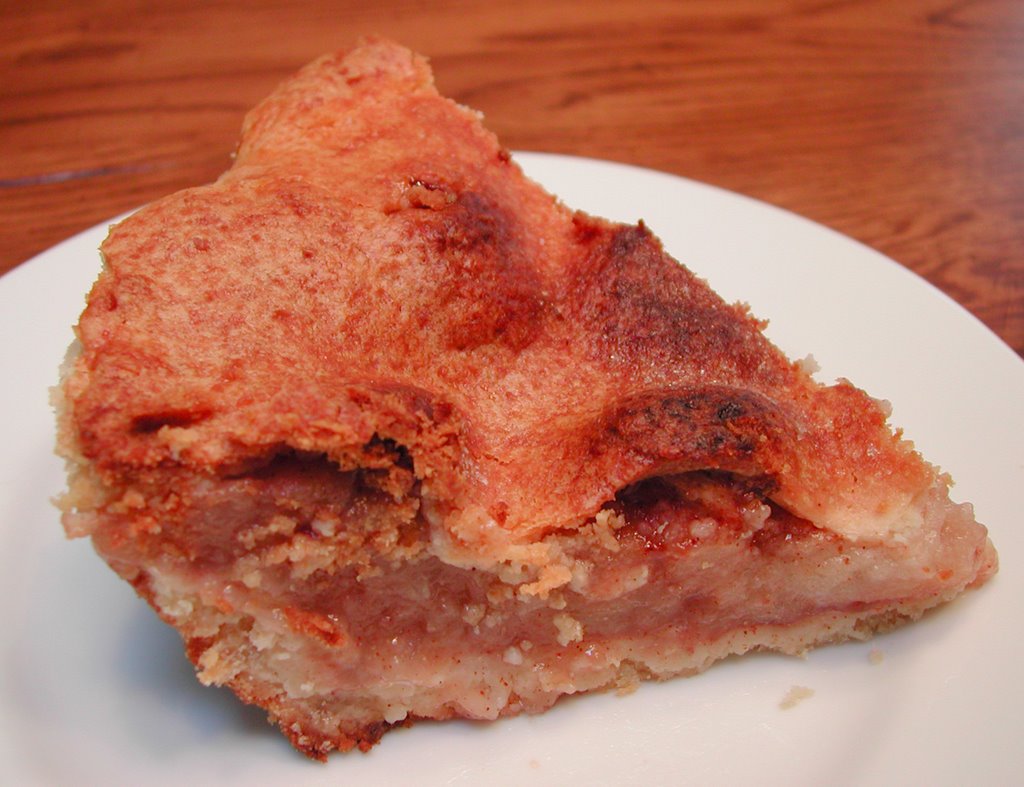
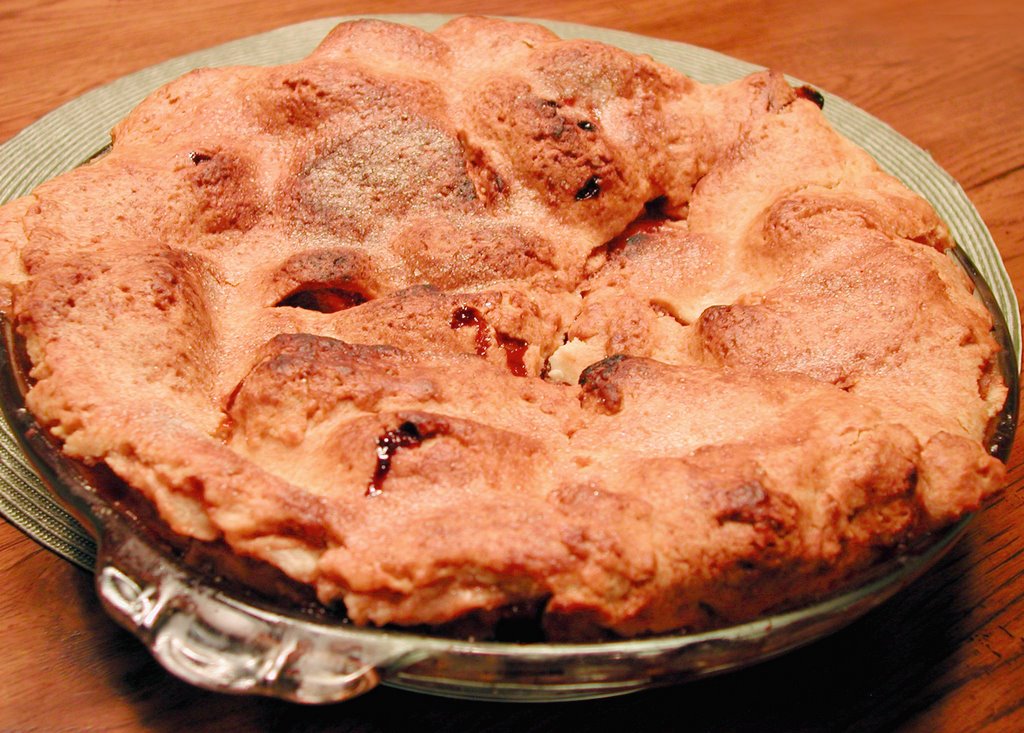
This weekend I was all about making an easy and delicious apple pie. I had a bag full of Macoun apples in the fridge that I have been eating daily with yogurt. But there was no way I was going to eat them all before they started to go bad.

I wanted to make a traditional apple pie with a crust, but I had limited time and I was getting tired, since it seems like all I did the entire weekend was cook.
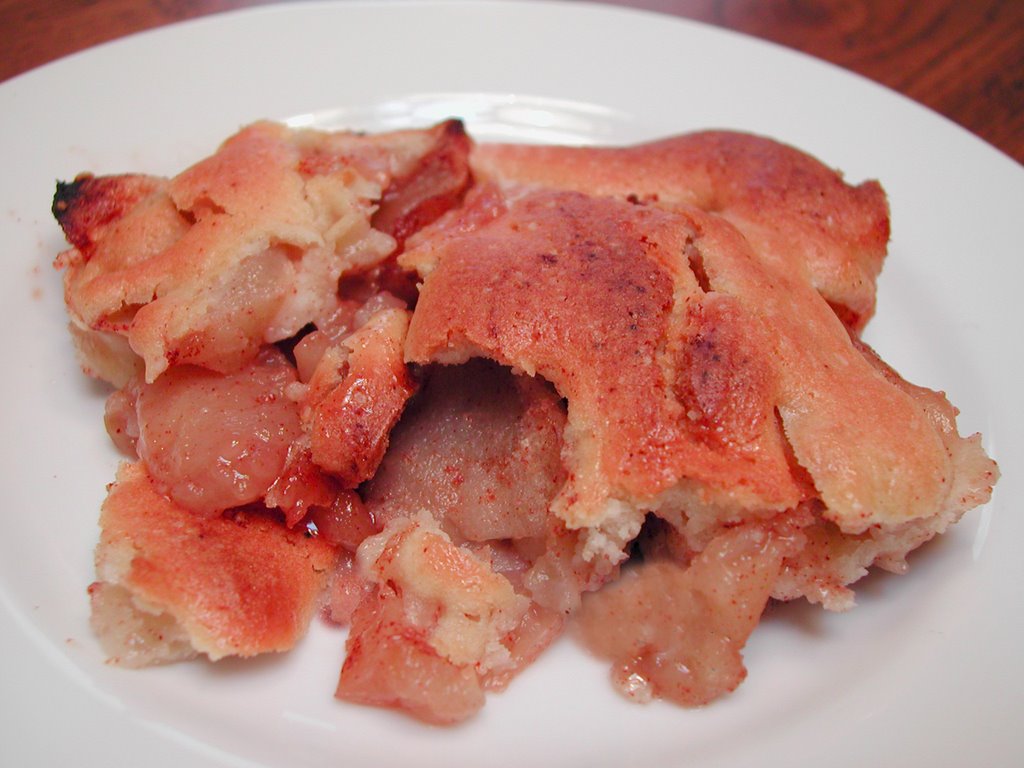
So I decided to make an Apple Cobbler and I was not at all disappointed with the end result.
In fact, I was very pleased!


Easy Apple Cobbler


Ingredients

8-10 peeled and sliced Apples (I used Macoun)
1 tablespoon lemon juice
1/4 cup sugar
1 heaping teaspoon cinnamon
1/2 teaspoon apple pie spice
2 tablespoons tapioka

Topping
1 cup all-purpose flour
1/3 cup sugar
3/4 teaspoon baking powder
1/4 teaspoon salt
5 tablespoons butter or margarine (softened)
1 large egg and 1 egg white (beaten)
1 teaspoon vanilla extract

Preheat oven to 4oo degrees.

In a very large bowl, mix the apples and lemon juice. Add the sugar, cinnamon, apple pie spice and tapioka. Set aside for about 10 minutes.

To prepare topping, mix together flour, sugar, baking powder, salt, butter and eggs.
Grease a pie plate with butter or margarine and fill with the apple mixture. Spoon topping over fruit.

Bake cobbler until topping is lightly golden and apple mixture is bubbling, about 35-45 minutes. Transfer pie to a wire rack to cool slightly. Serve warm.

Have you ever made a cobbler?

Monday, October 23, 2006

And The Winner Is... Cinnamon!

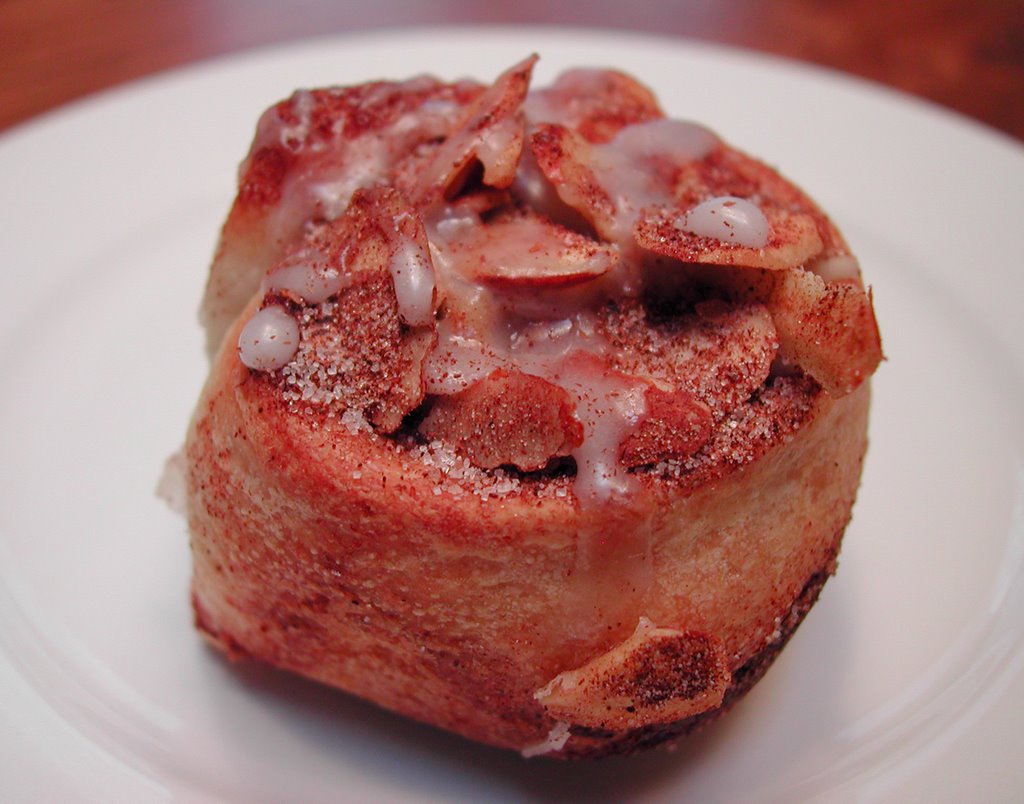
Yummy Cinnamon Ricotta Roll Ups!

Yep, those are the Pillsbury refrigerated bread sticks that I couldn't decide what to do with. Thanks to all of your ideas, I finally made up my mind and decided to make these cute little roll-ups.

The inspiration for these roll ups came from a recipe on the Pillsbury website, in the Bake-Off Recipe Collection, called Apple Ricotta Brunch Biscuits. Other than the fact that it used Pillsbury Grands Buttermilk Biscuits, it called for most all of the other ingredients that I wanted to use for my roll-ups. So I modified the recipe a bit and the finished result was fantastic!

Cinnamon Ricotta Roll-Ups


1/4 cup sugar, plus 1/2 tsp. for topping (I cut the sugar in half, so if you like your cinnamon rolls sweet, use 1/2 cup)
1 cup part-skim ricotta cheese
1 egg
1/2 tsp. almond extract
1/4 cup sliced almonds
1/8 cup raisins
1/2 tsp. cinnamon
1 can Pillsbury Low-Fat Bread Sticks

Icing


Mix 2 heaping tablespoons of powdered sugar, 1/2 teaspoon water or milk and a couple of drops of almond extract; adding more liquid if needed, until the sugar is smooth enough to drizzle on top of the roll ups.

Directions

Heat oven to 375°F. Spray glass baking pan with nonstick cooking spray. In small bowl, combine 1/4 cup sugar, cheese, egg and almond extract; beat at high speed for 1 minute.

In small bowl, combine almonds, teaspoon sugar and cinnamon; mix well. Separate dough into 12 separate strips and flatten with a rolling pin. Spread about 2 teaspoons of the ricotta mixture and sprinkle about 5 or 6 raisins onto each dough strip. (You will have extra ricotta mixture, see note below for a great way to use it).

Roll up each strip and carefully place them into the prepared baking pan. (The mixture will be a little thin and some will leak out). Once all of the roll-ups are arranged in the pan, sprinkle the top with the almond, cinnamon and sugar mixture.

Bake at 375 degrees for about 19-20 minutes or until roll-ups are deep golden brown. Drizzle with icing if desired. Serve warm. Store in refrigerator.

I was pleasantly surprised with the final product. Because the cheese was so liquidy, it sort of melted into the dough as the roll-ups baked. This was not a bad thing. It gave the dough a nice rich and sweet taste. Although they were not too sweet, as I don't usually like very sweet things in the morning. I could have used cream cheese for a firmer and slightly tangy result, but I really wanted to use up my leftover ricotta.

Note: I actually had enough of the ricotta mixture left from this recipe to make a...
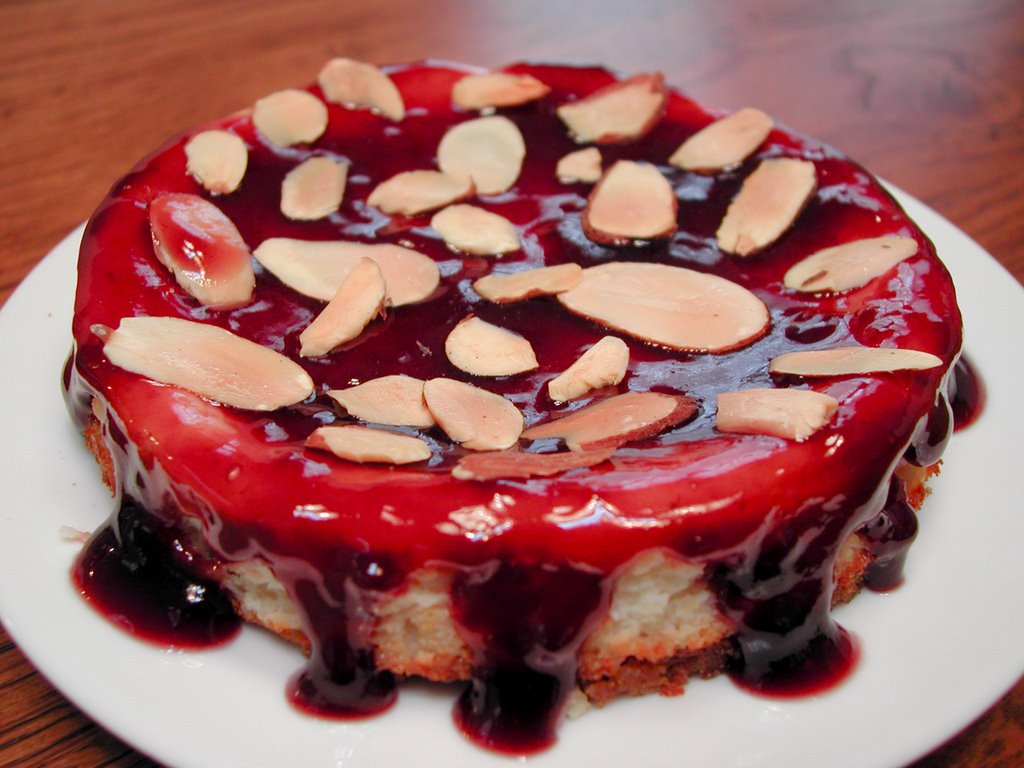
Mini Ricotta Cheese Cake!

I made a quick graham cracker crust with 3 graham crackers (crushed), 1 tablespoon of margarine/spread (softened) and 2 teaspoons sugar. I pressed it into the bottom of a mini spring pan and poured in the remaining ricotta mixture.

It baked at the same temperature as the roll-ups (375 for about 25-27 minutes, or until it was firm in the center.)

Melted seedless raspberry jam and toasted almond slices seemed like the perfect way to dress it up! I was in heaven.

I hope you try this recipe because I think you will love it.

Do you eat breakfast every morning? If so, is it something sweet or savory?

Friday, October 20, 2006

TGIF!!!!!

Question of the Day...

"What is the superstition surrounding taking the last piece of pie?"


A: "That it will bring good health, prosperity, and if the person is single, they will remain as such.
"

I heard this on the radio this morning and thought I would share it with all of you. I always thought it was supposed to be bad luck so I tried looking it up online and got some similar answers and a lot of other wacky superstitions as well.

On one website it said:

If you take the last piece of anything, you will be an old maid unless you kiss the cook.

Eat the point of a pie first and you will be an old maid.

Another website had these:

Spilling salt
Spilling salt means bad luck, having a quarrel.
In order to avoid the bad luck or to prevent quarrel, one has to throw but a pinch of salt that was spilled over the shoulder.
Explanation: In earlier times salt used to be rare, and thus expensive.
Country: BG, UA, BY, RO.

Raising a glass
When drinking, it is good to have a toast.
Explanation: Originally when toasting, wine or beer would flow from one into the other glass. This showed that the wine was not poisoned and that the guest had nothing to fear from the host.
Country: Europe, Asia.

Tell me some that you have heard...

Wednesday, October 18, 2006

Weeknight Whip-Up!

Fill Em Up and Chow Em Down!

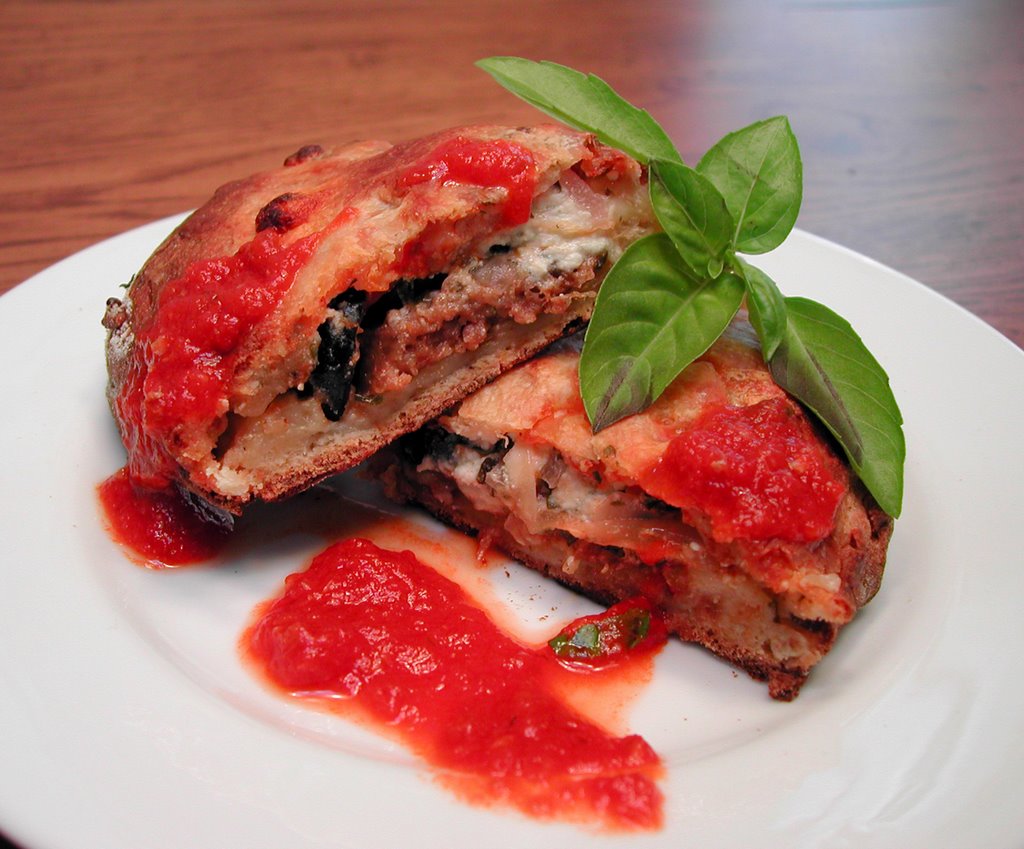
This was a quick way to make-over meatballs and sausage. With a can of Pilsbury Italian Loaf Bread in the fridge getting close to the expiration date, I was ready to create the perfect calzones. Or so I hoped.

There were plenty of fillings to choose from in my fridge to go with the meatballs and sausage but I narrowed it down to these: Ricotta Cheese, Mozzarella Cheese, Roasted Red Peppers, Red Onion, Black & Green Olives and Fresh Parsely and Basil.

I had never tried using canned dough for anything but what it was meant for, so it was kind of an experiment. I cut the dough into 4 equal pieces, formed circles and stretched it as much as I could without tearing it.

I sliced the meatballs, sausage, onion, olives and red peppers, piled the fillings on one side, leaving enough dough to fold over and then crimped the edges. I also added just a little tomato sauce to keep it moist. For a nice brown crust, I brushed the calzones with a little milk before putting them in a 450 degree oven. I baked them for about 20 minutes or until they looked light brown and crispy.

For garnish, I served the calzones with tomato sauce which made it nice for dipping.

All in all, I would have to give them a rating of "pretty damn good". For a store bought loaf bread, the crust was decent and the meatball and sausage filling was even better the second time around. I guess anything would taste better if it was covered in cheese, peppers, onions and olives!

I have another can Pilsbury Breadsticks in the fridge that is getting close to the expiration date. I was thinking about making something like cinnamon sticks.
Does Anyone Have Any Suggestions or Ideas?

Wordless Wednesday

Monday, October 16, 2006

Calling All Cooks...

Not As Easy As it Looks!

This weekend I had a little get together for Sunday dinner. I served Baked Rigatoni with Meatballs and Italian Sausage, along with some Italian Green Beans, Mixed Veggies and a Fresh Salad.

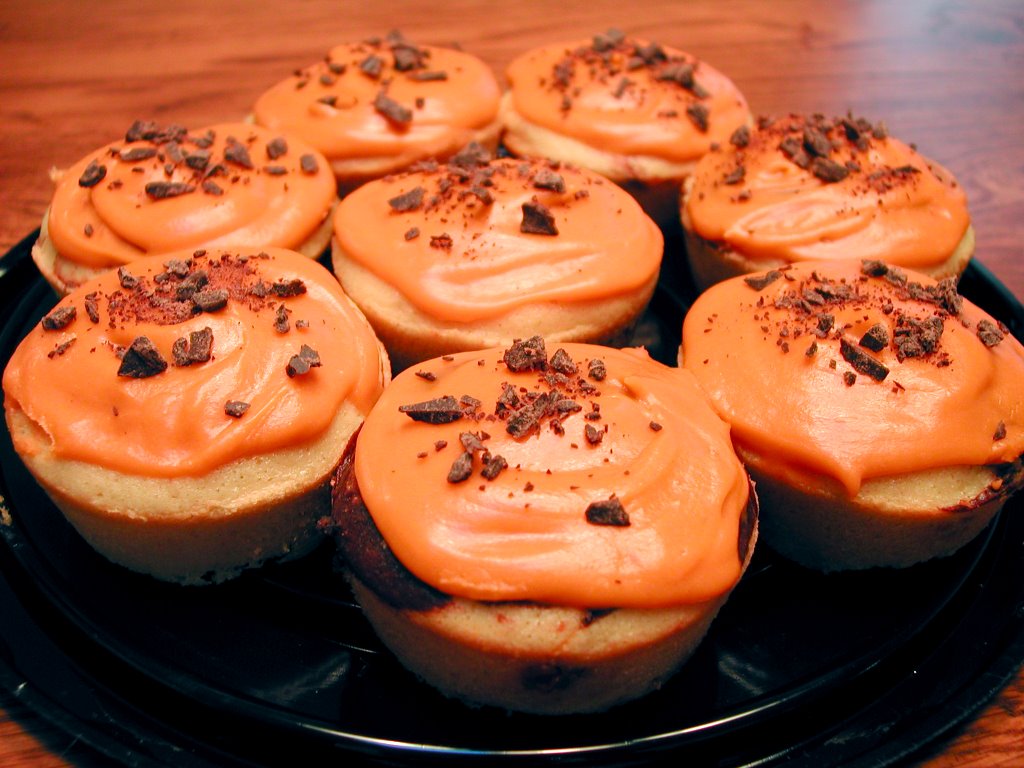
My neice and her husband were sweet enough to bring along some delicious goodies from Whole Foods... Shiraz Wine, Marinated Artichoke Hearts, Edam Loaf Cheese, Campo Montolbano Cheese, Thin Wafer Crackers, Mixed Olives, and an Artisan Loaf Bread. Everything was delicious! For dessert I had Marble Cupcakes with Butterscotch Chips and Butterscoth Frosting and my neice brought some Fresh Strawberries.

As soon as I saw the strawberries, I knew we had to melt some dark chocolate for dipping! Which brings me to my question...Why Did My Chocolate Seize?

I had a bag of Hershey's Dark Chocolate Chips, which we put into a glass bowl and microwaved on high for about 1 1/2 minutes, stirring half way through. The first attempt, my neice added a little cold water because the chocolate didn't seem to be liquid enough. It immediately seized.

I knew this would happen because the water was cold. The second time, I heated the chocolate the same way and it was fine but I thought I would try adding a little heated fat-free half & half to thin it a little. The same thing happened! Within 20 seconds the chocolate turned hard.

I don't understand why it happened with the warm half & half. I thought that is how Ganache was made. I have seen chefs on TV add a little cream to chocolate to thin it before pouring it over a cake or tart.

Oh well, the third time was the charm. We just melted the chocolate and used it as is. And being the resourceful women that we are, we made Bon Bons with the hardened chocolate! Let me tell you, they were delicious!!

What did I do wrong? Is it because I used "fat-free" half & half?

Thursday, October 12, 2006

Weeknight Whip-up!

Another Rotisserie Chicken Makeover
So Easy, So Quick...So Tasty!!


I would like to dedicate this post to Maltese Parakeet. A few posts back Maltese Parakeet suggested I change my name to Rotisserie Chicken Annie because it seems I have been eating a lot of it lately. Maybe she's right!

I love using rotisserie chicken in place of raw chicken when I'm in a hurry. There is no mess, less worry about raw chicken juices contaminating the kitchen, therefore less clean-up. Plus I don't particularly enjoy touching raw chicken. Don't get me wrong, some recipes just will not work unless you use fresh raw chicken, but when I'm looking for a quick, healthy and tastly meal; the rotisserie chicken always fills the bill. Hehehe! Pardon the pun!

Whenever I buy a rotisserie chicken, I never eat the whole thing in one meal. I usually end up with left over chicken from one of those birds almost every time. I could probably post a recipe every week on all the ways I use it as leftovers!

This week is no exception. I had a half of cooked breast left and felt like trying something different for a change. So the search began for some ideas online. I kind of felt like eating something with a little bit of tang and wanted to use broccoli and green beans in the mix. I found a recipe for Sesame Shrimp Stir Fry that used teriaki sauce, sesame seeds and sugar snap peas. Yum.

Voila, my inspiration for this week's rotisserie chicken makeover.

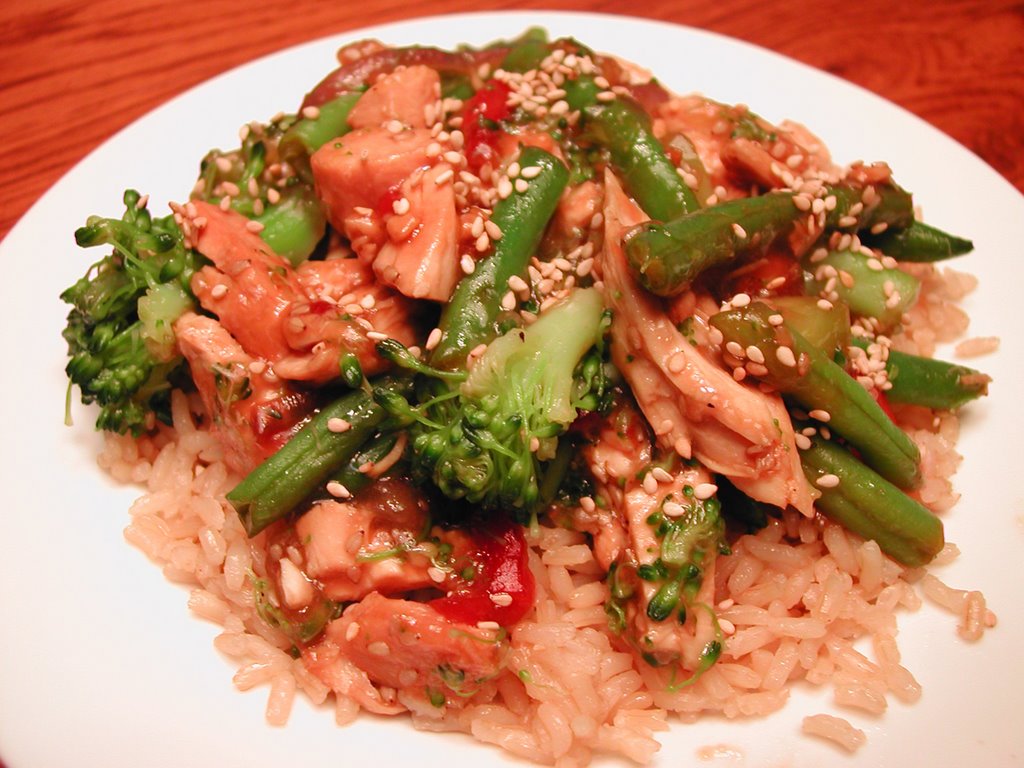
Sesame Chicken & Veggie Stir Fry

2 cups water and 1 cup uncooked white rice (or use microwave ready rice)
1 rotisserie chicken breast half, cut into bite size pieces
1/4 teaspoon ground ginger (or fresh grated ginger)
1/4 teaspoon cayenne pepper 1 clove garlic, minced (or 1 teaspoon of pre-chopped garlic)
1 tablespoon sesame seeds, plus 1 teaspoon more for topping
1/4 teaspoon ground black pepper 2 tablespoons sesame oil (or vegetable oil)
1 red bell pepper, sliced into thin strips (or1/4 cup jarred sliced roasted red pepper/pimentos)
1/2 small red onion, sliced (or 3 green onions, sliced)
3 tablespoons teriyaki sauce
1 1/2 cups broccoli florets & 1 1/2 cups green beans, steamed (or 1/2 pound sugar snap peas)
1/8 cup cornstarch
3/4 cup low sodium chicken broth
1/4 teaspoon salt, if necessary

DIRECTIONS

In a medium saucepan, bring salted water to a boil. Add rice, reduce heat, cover and simmer for 20 minutes. (I used Uncle Ben's Whole Grain Brown Ready Rice which cooks in 90 seconds in the microwave.)
While rice is simmering, combine chicken, ginger, cayenne pepper, garlic, 1 tablespoon sesame seeds and black pepper in a large bowl.
Heat a large wok or skillet and add the remaining teaspoon of sesame seeds. Watch carefully stirring often until light brown. Remove the seeds and set aside. Add the oil to the skillet. Add red bell pepper, onions and garlic; saute 3 to 4 minutes to soften slightly. Add teriyaki sauce. Add steamed broccoli, green beans and chicken with seasoning; saute 4 minutes or until everything is heated through. Stir cornstarch into chicken broth and add to wok; cook, stirring until mixture boils. Sprinkle with salt. Spoon chicken mixture over rice. Sprinkle with extra toasted sesame seeds.

This was one of the best left over dishes I've made yet. Maybe it is because I haven't had teriaki in a long time, but believe me it was good.

How often do you buy rotisserie chicken?

Wednesday, October 11, 2006

Tuesday, October 10, 2006

Tuesday Trivia

Q: Pepperoni is America’s favorite pizza topping.

Is Japan’s favorite pizza topping:

(a) eggs; (b) pickled ginger; or (c) squid?


A: Squid. Australians prefer eggs; pickled ginger is #1 in India. The French like fresh cream.
source: http://halife.com/trivia/food.html

What is your favorite pizza topping?

Monday, October 09, 2006

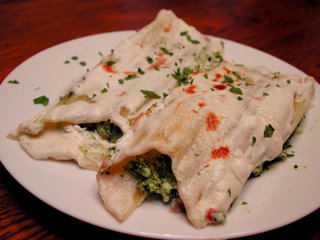
Guilt Free Baked Pasta

Reduced-Fat Manicotti
(and you'd never know it!)

It is "Flavors of Italy" week at my local IGA, so all my favorite Italian foods are on Sale!! And you know how I love a Sale!

I picked up some broccoli rabe, fresh Italian parsely, a red onion, garlic, proscuitto and ricotta. I really didn't have any particular recipe in mind while I was shopping, but as I stood in line at the register to pay, I thought about what I was going to make. The first thing that came to my mind was a baked pasta dish. But I didn't want anything too filling or fattening... So what kind?

When I got home, I went online and searched for a recipe with the above specified ingredients and came up with a couple for canneloni. I knew I didn't have canneloni (even in my overcrowded 'pasta' pantry closet). But I did have manicotti. This would do.

My inspiration came from a recipe on Epicurious for Spinach and Cheese Canelloni. I didn't use the sauce from that recipe though, I made a bechamel sauce adapted from Giada DI Laurentiis. Although I'm sure she would not approve, because I substituted fat-free half and half for the whole milk and used some smart balance spread in place of some of the butter.
This what I came up with.

Broccoli Rabe and Cheese Manicotti
Adapted from Gourmet -March 2003 "Spinach and Cheese Canelloni"
Makes 10 Manicotti


Low-Fat Bechamel Sauce
1 1/2 tablespoons unsalted butter, 1 tablespoon smart balance spread
1/4 cup all-purpose flour
2 cups fat-free half and half (warmed up in the microwave)
Pinch freshly grated nutmeg
Pinch cayenne pepper
Salt and pepper


For manicotti
3 tablespoons extra-virgin olive oil
1/4 of a large red onion, chopped
2 garlic cloves, finely chopped
One large bunch of broccoli rabe, washed, trimmed, blanched and chopped
Half of a 15 oz container part-skim ricotta (I used Supreme, which is my favorite)
1 large egg, lightly beaten
1/4 cup chopped fresh flat-leaf parsley, plus more for garnish
3 slices of prosciutto (sliced a little thicker than usual), chopped
salt
black pepper
1/2 cup finely grated Pecorino Romano or Parmigiano-Reggiano (I used Parmigiano)
10 manicotti pasta

Special equipment: a 13- by 9- by 2-inch ceramic baking dish or other shallow 3-qt flameproof baking dish (not glass). *I used glass. Just cover all of the exposed top edges with foil before placing under the broiler.

Make bechamel sauce:
In a medium pot, melt the butter and spread over medium heat. When completely melted, add the flour and whisk until smooth, about 2 minutes. Gradually add the milk, whisking constantly to prevent any lumps from forming. Continue to simmer and whisk over medium heat until the sauce is thick, smooth and creamy, about 10 minutes. The sauce should be thick enough to coat the back of wooden spoon. Remove from heat and add the nutmeg and chayenne pepper. Stir until well combined and check for seasoning. Set aside.

Make manicotti:
Place oil, onion and garlic in a 5- to 6-quart heavy pot over low heat, allowing onion and garlic to heat up slowly in the oil, then sauté, stirring occasionally, until lightly browned, about 5 minutes. Add broccoli rabe and sauté, stirring, until just wilted, about 3 minutes. Remove from heat and cool completely. (At this point I put the broccoli rabe mixture in the food processor to ensure a smooth texture when mixed with the cheese. You could skip this step if the texture doesn't bother you.)

Stir together ricotta, egg, parsley, prosciutto, salt, pepper, and 1/3 cup cheese in a bowl, then stir in broccoli rabe mixture.

Boil pasta in a 6- to 8-quart pot of boiling salted water, stirring to separate, until just tender, about 6 minutes. Drain and gently transfer to kitchen towels (not terry cloth).

Preheat oven to 425°F.

Spread 2/3 cup sauce in greased baking dish. Gently stuff ricotta filling into each manicotti dividing evenly for all 10. If some tear, just fill them and overlap the seams on the bottom. Transfer, seam side down, to baking dish. Arrange snugly in 1 layer. Spread 1/2 cup more sauce over manicotti and sprinkle with remaining cheese. Bake, covered with foil, in middle of oven until sauce is bubbling, about 20 minutes.

Turn on broiler.

Remove foil and broil cannelloni about 5 inches from heat until lightly browned, 2 to 4 minutes. Let stand 5 minutes before serving. Reheat remaining sauce and serve on the side. Sprinkle with fresh Italian parsely.

Note:
• Manicottii can be assembled (but not baked) 1 day ahead and chilled, covered with plastic wrap. Let stand at room temperature 15 minutes before baking. Remaining sauce will need to be thinned slightly.

This recipe did take some time in the kitchen, but I made it a day ahead so that it would be easy to heat and serve. I really enjoyed the flavors in this dish. Everything mingled nicely together. Also, the white sauce was a nice change from the usual marinara and it wasn't too heavy because it was low-fat.

Have you ever used fat-free half and half in any your recipes?

Tuesday, October 03, 2006

More Scents of Autumn!

The Quintessential Fall Cookie
(At least in my book)

When I think of a Hermit cookie several thoughts come to mind. I imagine cool weather, colorful foliage, and spicy flavors.

I don't think of anti-social people secluded in the deep woods. So I can't imagine why these cookies are called Hermits.


The dictionary'
s definition of a hermit is:

  1. A person who has withdrawn from society and lives a solitary existence; a recluse.
  2. A spiced cookie made with molasses, raisins, and nuts.
Quite a contrast in comparisons, isn't it?

O.k. enough about that and on with the recipe. Actually, I don't know where this recipe came from. I cut it out of the newspaper years ago and there was no credit given for the author. I included the recipe exactually as written and included my changes in red.

I decided to make them lower in fat by changing some of the ingredients, but I have to tell you that I did have a few problems with the baking time. I'm not sure if it has to do with the different ingredients or the recipe in general. In the end though, they did turn out good!


"Reduced-Fat" Hermits

1 cup sugar ( I used 3/4 cup)
1/4 cup butter (I used 2 Tablespoons Smart Balance Spread)
1/4 cup lard (I used 1/3 cup Dried Plum Puree, aka:Prune Puree)
3 cups sifted flour (I used 2 cups A.P Flour. and 1 cup WW Pastry Flour )
1 tsp.ground cloves
1 tsp. cinnamon
1/2 tsp. nutmeg
1/4 tsp. ginger
1/2 tsp. salt
1 tsp. baking soda
1/2 cup molasses
1/2 cup buttermilk or sour milk (I used fat-free buttermilk)
1egg, beaten (I used 2 egg whites)
1/2 cup raisins

Preheat oven to 350 degrees.

In a large bowl, cream together the sugar and butter-lard combination.( I creamed together the sugar and the spread, then added in the puree.) In another large bowl, sift together the flour, the spices, salt and baking soda.

Combine the wet and dry ingredients alternately with the molasses and milk. Add the beaten egg and raisins. Mix well.

Spread mixture on a greased baking sheet so that it is about 1/2 inch thick.( I did this free form in a cookie sheet on parment paper. The dough did not touch the sides of the pan.) Bake for 10 to 12 minutes. Be careful not to overbake the cookies. (After 12 minutes my cookies were still raw in the middle, so I left them in for another 10 minutes.)

When they are firm to the touch, they are done. Cut into oblong cookie shapes. If desired, you can sprinkle confectioners’ sugar over the tops of the cookies while they are still warm.
Note: You can substitute Crisco or another shortening for the lard. Also, you can use 1/2 cup brown sugar and 1/2 cup granulated sugar, and you can add 1 tsp. ginger and 1 cup of chopped walnuts, if desired. Makes 24 hermits.

Does Anyone Know Why Are They Called "Hermits"?

Weeknight Whip-up!

Couscous with Chicken and Vegetables

Nothing is easier to cook than couscous. In fact, you really don't even cook it. Boil the water or broth, take the pan off the heat, add the couscous and cover. Let it sit for 5 minutes and fluff with a fork. It can't get much simplier than that!

It makes a great accompaniment to leftovers. In my case, I had leftover steamed mixed vegetables and store bought rotisserie chicken.

To jazz it up a bit, I sauted some red onion and garlic in extra virgin olive oil, added the veggies and a little garlic powder.

Then I added a little Wondra flour, stirred it into the oil and cooked it a bit. Next, fresh squeezed lemon juice, low-sodium chicken broth and small pieces of the leftover chicken breast. I covered the pan and let it slowly simmer.

Once everything was heated through, I added just a dash of white wine vinegar for a little tangyness. And for some freshness, I added chopped fresh parsely and basil. To top it all off, I sprinkled on a little feta cheese and spooned it over the couscous.

Easy and satisfying for a mid-week meal!

How often do you eat Couscous?

Tuesday Trivia

EVERYONE LOVES COKE!

Q: How many Coca-Colas will be consumed worldwide during the next hour:
(a) 17-million; (b) 27-million; or (c) 37-million?


A:
About 27-million. That's over 600-million per day.
source: http://halife.com/trivia/food.html

How often do you drink soda? What is your favorite?

Sunday, October 01, 2006

The Scent of Autumn!

"Not Entirely Homemade But Close" Spicy Pumpkin Muffins!

Lately I've been trying to clear out my freezer, pantry cabinet and cabinets. While trying to take an inventory of what was in my cabinets, I came across a box of pumpkin loaf mix. I immediately imagined how wonderful it would make the house smell while baking. I was sold.

There was a recipe on the side of the box for pumpkin ginger cookies that sounded really good. The recipe called for cyrstalized ginger and raisins, yummy! I was tempted to make them, but I really wanted muffins, so I compromised. I made the pumpkin muffins, added in the crystalized ginger and made a few other adaptations to make them a little more homemade.

First off, I reduced the fat by replacing most of the oil with unsweetened apple sauce and cut one of the egg yolks out. Secondly, I used fat-free buttermilk in place of regular milk. It gives the crumb a better texture and flavor. And as I mentioned, added crystalized ginger. I only added a 1/8 cup because I wasn't sure how much of a spicy "bite" it would give to the flavor. I think it was just right, but 1/4 cup would be fine as well.

Spicy Pumpkin Muffins
Makes 12 Muffins

1 box of Pillsbury Pumpkin Loaf Mix
1 egg and 1 egg white
1 T oil
1/8 - 1/4 cup chopped crystalized ginger
1 cup buttermilk

Follow the directions on the box. I baked mine for about 18 minutes at 375 degrees in a dark coated muffin pan.

These muffins turned out really tasty and were a pleasant change to my usual line-up of blueberry, cranberry-orange and corn. (Not that there's anything wrong with them!)

What recipe reminds you most of Autumn?

Thursday, September 28, 2006

Still Emptying Out My Freezer!

From Freezer Leftovers to Pizza Extraordinaire!

I didn't feel like cooking a big meal this weekend and knowing how much food I had in the freezer, I decided to create something from freezer stragglers.

What I found:
Homemade pre-baked focaccio
Homemade pesto
Shredded mozzarella
Store bought cooked rotisserie half chicken breast

What does it all add up to? White Pizza with Chicken! What more would I need? I know. Fresh tomato and basil from the garden and olive oil.

White Pizza with Chicken

Preheat oven to 450 degrees.
Spread pesto on the foccacia and drizzle with olive oil. Cover with shredded mozzarella. Shred chicken and add the pieces on top. Thinly slice the tomato and arrange on top along with a few basil leaves. Sprinkle with Italian seasoning, salt & pepper, a little more olive oil and bake for 10-12 minutes.

This pizza was really tasty and satisfying. I don't normally have chicken on my pizza, but in this case it was a great addition. It gave the pizza more substance and it worked really well with the pesto.

How full is your freezer? Sadly desolate or busting at the seams?

Tuesday, September 26, 2006

Weeknight Whip-up!

Quick, Easy, Healthy and Cheap Stuffed Peppers

I think we all appreciate recipes that are quick and easy for weeknight dinners. I do. But I also like to make dinners that are healthy, nutritious and inexpensive as well. I made these Stuffed Peppers in about 20 minutes and I used items that are usually in everyone's kitchen.

Stuffed Peppers
Makes 4 Medium Peppers

4 Medium Peppers (I used Green Peppers, but you can use whatever color you like or even tomatoes*)
2 T Olive Oil, plus more for drizzling
1 Shallot (You can substitute 1 small onion if you prefer)
2 Cloves of Garlic (I used 1 tsp. of the pre-chopped)
1/4 lb. Ground Turkey (I used breast which is 99% fat free, but you can the dark meat if you prefer)
1 package of Uncle Ben's Ready Rice (I used brown rice because it is more nutritious than white)
1/4 cup Chopped Fresh Parsley (You can substitute dried, just use alot less)
1 T Chopped Fresh Basil (You can substitute dried, just use alot less)
1 T Garlic Powder
2 T Pesto (If you don't have pesto on hand, you can just add more Basil )
1 8 oz. can of Tomato Sauce, Divided (I used Hunt's Roasted Garlic)
Pinch of Cheyanne Pepper
1/3 cup Parmesan Cheese
Salt & Pepper

Preheat the oven to 375 degrees.

Rinse peppers, cut of tops and remove seeds and ribs. Fill a baking dish with a little water, place peppers inside, cover and microwave on high for about 7 minutes or until peppers are tender but still holding their shape.

Dry out baking dish and peppers. Add a small amount of tomato sauce to the bottom of the baking dish, place peppers ontop and set aside.

Cook the rice package according to directions, but for only 75 seconds. Set aside.

In a medium skillet, add 2 T oil and saute the shallot and garlic until fragrant. Add the ground turkey and break it up into small pieces while it cooks. Add in the parsley, basil, salt, pepper, cheyanne, garlic powder, pesto and mix well.

Mix in the rice. Add in the tomato sauce, reserving a small amount in the can and mix until well blended. Mix in the cheese.


Stuff the peppers with the mixture and top with the remaining sauce. Bake for about 10-12 minutes or until the sauce is bubbling. Drizzle the top of the peppers with olive oil and serve immediately.

*For Stuffed Tomato ...Just cut off the top, core and hollow out most of the pulp and seeds, leaving enough to keep the tomato firm. There is no need to pre-cook the tomato, just add in the turkey mixture and bake!

What is your favorite quick and easy weeknight dinner?

Monday, September 25, 2006

Breakfast for Dinner!

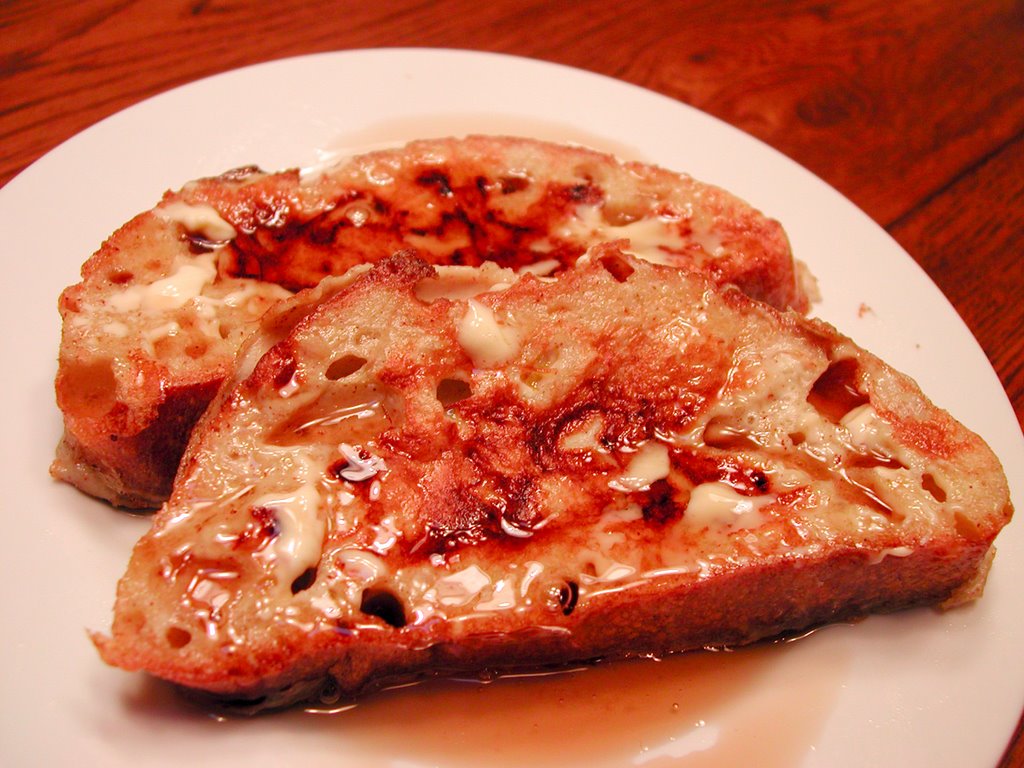
French Toast Always Hits The Spot!

It's just you tonight and you can't think of what to have for dinner. No problem, just make a classic- French Toast. It's easy and cheap to make. All you need is 5 minutes, a few eggs, bread, milk, butter and for me a little bit of Cinnamon, Sugar and Maple Syrup are a must!

This is not really a recipe-just a way to a means:
Serves One

A couple slices of Bread, (I used 2 slices of Italian loaf, but you can use whatever you have in the house)
1 Egg and 1 Egg White (I usually use this ratio for 2 slices of bread, plus eliminating the egg yolk cuts alot of the extra fat out)
About a tablespoon of Milk
1/2 teaspoon Cinnamon
1/2 teaspoon Sugar
1/2 teaspoon Vanilla
Pinch of Salt
1 Tablespoon of Butter or Margarine, Plus more for topping
Maple Syrup

Heat the butter in a skillet until foamy. Beat the eggs in a shallow bowl wide enough to fit the bread slice. Add in all remaining ingredients and mix until blended. Place the bread inside the bowl and allow the bread to absorb the egg mixture. Flip the bread to soak the other side.

Place in the skillet and cook until golden brown on both sides, or until middle is set.
Serve with Maple syrup and extra butter or margarine.

What is your favorite breakfast for dinner food?

Sunday, September 24, 2006

Tuesday Trivia

Did You KnowI recently read something interesting in the Parade Magazine. There is a column called AskMarilyn. According to Parade Magazine, Marilyn is listed in the Guinness Book of World Records Hall of Fame for "Higest IQ". Pretty impressive!

People write to her with various and sometimes unusual questions. A few weeks ago someone asked why food tastes a little different when eaten with the opposite hand than the one usually used.

This was her answer:
Taste receptors are arrayed symmetrically, with certain areas sensitive to sweet and salty flavors while others are tuned to sour and bitter flavors. When you use your favored hand to place food inside your mouth-especially with a utensil such as a fork or spoon- you do it the same way again and again. But if you use your other hand, the food arrives from an unfamiliar angle and traverses a somewhat different path of taste buds. The change is unimportant but noticeable.

Of course I had to try it myself and Yup it is true. I usually eat with my right hand and when I tried eating cereal with my left hand, the cereal tasted a little saltier. Pretty cool.

Give it a try and let me know if you notice a difference!

Product Review...the good, the bad and the ugly!

They're GOOD!

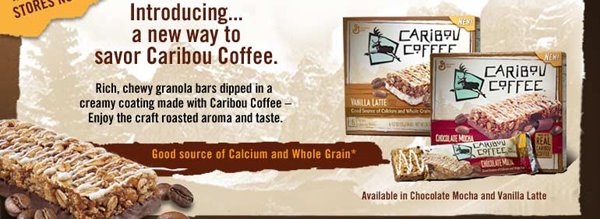
I had never even heard of Caribou Coffee before, but I was cutting coupons one day and came across one for these. They sounded good to me; "RICH, CHEWY GRANOLA BARS DIPPED IN A CREAMY COATING MADE WITH CARIBOU COFFEE"- I WAS SOLD!

I love granola bars. I often eat them for a snack or dessert. Some of my favorites are: Nature Valley Fruit & Nut, Sweet & Salty Nut(Peanut) and the Peanut Butter and Oats'N Honey Crunchy Bars. Now that I have tried the Caribou Coffee bars they will definately be in the mix.

If you like chewy granola bars and you like coffee, you'll love these babies! Geez, I sound like one of those 'knock off' perfume commercials. But seriously, try them, I give 'em 2 thumbs up!!

How often do you eat granola bars?

Tuesday, September 19, 2006

Pot Roast- Italian Style!

My Very First Pot Roast!

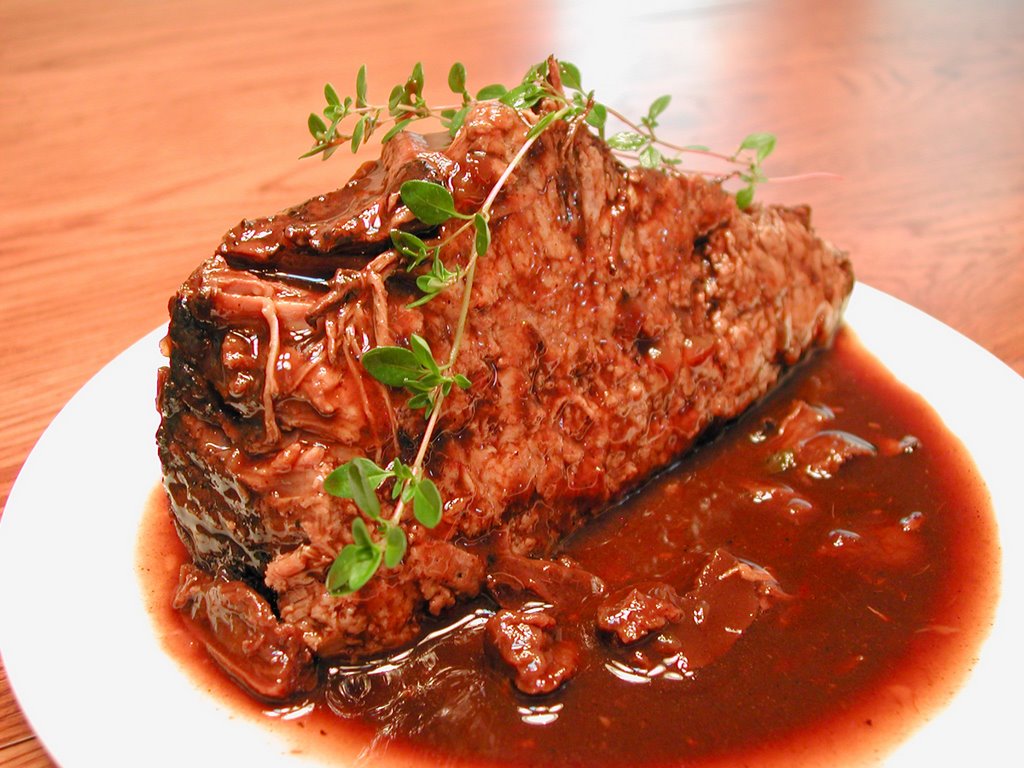
Since this was the first time I ever attempted to make pot roast, I was realy nervous about it! I have to be truthful and tell you I did screw up a little, but in the end it was fabulous!

Part of the screw up has to do with my electric stovetop, which I loathe. OK, now that I got that off my chest, let me tell you what happened.

We all know that when searing a piece of meat, the pan must be very hot in order to create that golden brown crust. Well, my pan was hot alright, so hot that it blackened the meat and smoked my whole house out. I tried to turn the heat down, but it took too long for it to cool down, the damage was done.

The second mistake I made was to follow the recipe to closely. It said to sear the meat on all sides for a total cooking time of about 15 minutes. Well, knowing how hot the pan was, I should have turned the meat much quicker on each side to avoid burning it.

The third mistake I made was to scrape up the brown bits (in my case burnt bits) as I added the liquid. I should have realized that the blackened bits would not melt into the liquid, but just make it taste burnt.

Even after all of these blunders, I continued on with the recipe and hoped for the best. I had reservations about the temperature and cooking time in this recipe after reading several others which recommended lower temps and longer cooking times. My good judgement told me to compromise and reduce the temperature to 300 degrees to start and cooked the meat for around 3 hours. Being such a novice, I decided to break off a piece to taste. I wasn't impressed. The meat was stringy and tasted burned. I was so disappointed. I decided I could live with the burned flavor, since it reminded me of a charcoaled steak, but it had to be more tender. So back into the oven it went. I lowered the oven temp to 225 and left it in for another hour.

Once the meat cooled, I refrigerated it and tried to forget about the disaster. The next day I reheated the roast at 225 degrees for another 3 hours. That did the trick! I also strained the liquid through a sive to get rid of all the burnt bits. What a difference. The meat just fell apart as I tried to cut slices. It was delicious!!!!!!

Stracoto with Porcini Mushrooms
Recipe courtesy Giada De Laurentiis
Recipe Summary
Difficulty: Easy
Prep Time: 15 minutes
Inactive Prep Time: 15 minutes
Cook Time: 3 hours 25 minutes (My total cooking time was around 7 hours)
Yield: 6 to 8 servings
User Rating:5 Stars

1 (4-pound) boneless beef chuck roast (I used bottom round roast)
Salt and freshly ground black pepper
3 tablespoons olive oil
2 onions, sliced (I used 2 shallots)
6 garlic cloves, coarsely chopped (I just crushed mine)
1 cup dry red wine
1 3/4 cups canned beef broth
1/2-ounce dried porcini mushrooms (I rinsed mine and rehydrated them in the beef broth. Bring the broth to a boil and take off the heat, add the mushrooms, cover and let sit for 15 minutes)
1 large sprig fresh rosemary, plus extra for garnish (I used 5 sprigs of tyme, plus extra for garnish)

Preheat the oven to 350 degrees F. (I Started out at 300 degrees and lowered the temp to 225 after 3 hours) Pat the beef dry with paper towels. Sprinkle the beef generously with salt and pepper. Heat 2 tablespoons olive oil in a heavy 6-quart roasting pan over medium-high heat. Add the beef and cook until brown on all sides, about 15 minutes total cooking time. Transfer the beef to a bowl. Add remaining tablespoon oil to the pan, add the onions and saute until tender, scraping up the brown bits on the bottom of the pot, about 5 minutes. Add the garlic and saute 1 minute. Add the wine and boil 1 minute. Stir in the broth and mushrooms. Return the beef to the pan. Bring the liquids to a boil. Cover and transfer to the oven. Braise until the beef is fork-tender, turning the beef over halfway through cooking, about 3 hours. (The first day I cooked it for a total of about 4 hours. The next day I reheated it for another 3 hours at 225 degrees.)
Transfer the beef to a cutting board. Tent the beef with foil and let stand 15 minutes. Meanwhile, spoon any excess fat off the top of the pan juices. Transfer the pan juices and vegetables to a blender and puree until smooth. (I didn't do this step. I picked out the tyme stems and took out the mushrooms, then strained the liquid.) Combine the sauce and rosemary sprig in heavy medium saucepan. Bring to a boil. (At this point, I added 1 tablespoon of cornstarch mixed with 1 tablespoon of cold water and cooked for another 2 minutes to thicken the gravy.) Season the sauce, to taste, with salt and pepper. Cut the beef across the grain into 1/2-inch-thick slices. Arrange the sliced beef on a platter and garnish with rosemary. Spoon the sauce over and serve, passing the remaining sauce in a sauce boat.
----------------------
Well, I did it. I survived my first pot roast and ended up loving it! I've been eating it everynight and it heats up nicely in the microwave, in the gravy on low, low heat!!

What was the worst cooking disater you ever survived?

It's Apple Pie time!!

My Inspiration For Making This Pie?
Macintosh Apples for 25 cents/lb.

Sounds too good to be true, right? Well, it was true. The grocery store was celebrating it's 25th Anniversary and was offering things all weeklong for 25 cents. It was a deal I just couldn't pass up. So I bought almost 4 lbs. of apples and set off on a mission to make the best apple pie.

Actually, it is officially my first apple pie. I have made apple crisp and apple cobbler many times, but never a pie with a crust. One of the reasons is due to time and the other is due to fat. Everyone knows that a good crust is made with either butter, crisco or lard. So I have always hestitated to make one, because I figured it would never come out as good if I substitued with low-fat margarine.

I decided to try a crust that was a little different from the norm, by Cook's Illustrated. It is really not meant to be a crust for an Apple Pie. It is supposed to be a pie shell that is pre-baked and ready to fill, but it sounded easy to make so I went for it. I made some changes and ran into some potential disaters along the way, but in the end with a little surgery it turned out great. Actually someone who tried the pie, said it was the BEST CRUST they ever tasted. Not bad for my first try!


Apple Pie

8-10 Macintoch Apples
Lemon juice from 1/2 lemon
2 Tablespoons Tapioca
1/3 cup Sugar or more depending on sweetness of your apples, plus 1 tablespoon for top of crust
1 teaspoon Cinnamon
1/4 teaspoon Nutmeg
1 tablespoon Milk, set aside in small bowl
Double recipe of "No Fear Pie Crust"

Squeeze lemon juice into a large bowl. Peel, slice and core apples, dropping them into the bowl with the lemon juice. Add tapioca, 1/3 cup sugar, cinnamon, nutmeg. Mix well and let stand 15 minutes.

Preheat oven to 400 degrees.

Pour apple mixture into prepared pie crust and cover with top crust. Seal and crimp edges. Brush the top of the pie crust with milk and sprinkle with a teaspoon of sugar.

Place pie on a foil lined baking sheet. Bake for about 50 minutes to 1 hour, or until crust is golden brown and the juices are slowly bubbling.


Cook's Illustrated "No-Fear Pie Crust"
Makes one 9-inch Pie Shell
*Double the recipe for pie shell and pie top crust

The pastry can be pressed into the pie plate and refrigerated for up to 2 days or double-wrapped in plastic and frozen for up to 1 month. Once baked and cooled, the shell can be wrapped tightly in plastic and stored at room temperature for up to 1 day.


1 1/4 Flour
2 tablespoons Sugar
1/4 teaspooon Table Salt
8 Tablespoons Unsalted Butter (1 stick), softened but still cool (I used Smart Balance Buttery Spread which has only 2.5 grams of saturated fat per tablespoon compared to 7 grams for butter)
2 ounces Cream Cheese, softened but still cool ( I used low-fat Neufchatel-which has 1/3 less fat than regular cream cheese)

1. Lightly coat 9-inch Pyrex pie plate with cooking spray. Whisk flour, sugar, and salt together in bowl.

2. With electric mixer at medium-high speed, beat butter and cream cheese in large bowl, stopping once or twice to scrape down beater and sides of bowl, until completely homogenous, about 2 minutes. Add flour mixture and combine on medium-low until mixture resembles coarse cornmeal, about 20 seconds. Scrape down sides of bowl. Increase mixer speed to medium-high and beat until dough begins to form large clumps, about 30 seconds. Reserve 3 tablespoons of dough. Turn remaining dough onto lightly floured surface, gather into ball, and flatten into 6-inch disk. Transfer disk to greased pie plate.*

3. Press dough evenly over bottom of pie plate toward sides, using heel of your hand. Hold plate up to light to ensure that dough is evenly distributed. With your fingertips, continue to work dough over bottom of plate and up sides until evenly distributed.

4. On floured surface, roll reserved dough into 12-inch rope. Divide into three pieces, roll each piece into 8-inch rope, and form fluted edge** (see website for photos 1 through 4). Wrap in plastic and refrigerate at least 1 hour.


5. Adjust oven rack to middle position and heat oven to 325 degrees. Lightly prick bottom of crust with fork. Bake until golden brown, 35 to 40 minutes*. Cool on wire rack. (If large bubbles form, wait until crust is fully baked, then gently press on bubbles with kitchen towel. Bubbles will settle as crust cools.)

* If making pie shell and top crust, split the dough into 2 equal portions. Continue directions for shell and pre-bake for about 25 minutes, until very light brown. For top crust- refrigerate crust and after at least one hour, roll dough out in between two pieces of waxed paper to at least 12" in diameter. Peel off top piece of waxed paper and cut 5 slits in center of crust. Carefully place on top of apples in prepared pie shell.

** This step is fine if you are using this crust just as a shell for another type of filling, but for this apple pie just flatten sides all the way to the top of the pie plate. I followed the directions and the crust shrank. The fluted edge was way to low down for the pie. I would suggest putting some weights, such as dried beans in foil in the crust as it cooks to keep it from shrinking and bubbling up in the center.

What is Your Favorite Type of Apple Dessert? Apple Crisp, Apple Cobbler, Apple Pie, or Other?

Wednesday, September 13, 2006

Product Review...the good, the bad and the ugly!

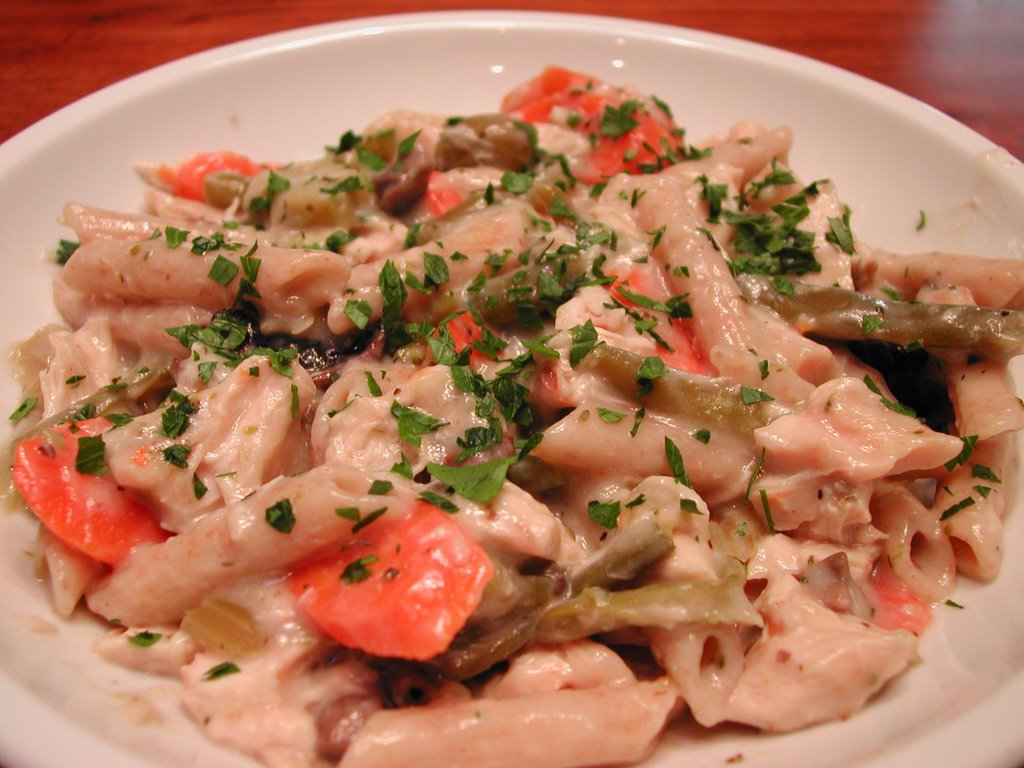
Campbell's® Healthy Request® Quick Chicken & Pasta Primavera
The Verdict: Not bad.


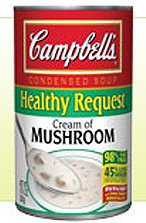
I am a big fan of quick and easy to prepare meals on weeknights. I normally wouldn't buy campbell's condensed soups to make a meal because the high amount of sodium in them. So when I heard about the Healthy Request line, I was curious but a little sceptical. I finally broke down and bought some Campbell's Healthy Request Cream of Mushroom Soup.

My first reaction upon opening the can was ewwwww!
It smelled kind of weird, like chemicals. I thought it was going to be really bad, but in the end it turned out O.K. I would however, suggest topping it off with some fresh chopped parsley to add a little bit of freshness. Plus, a fresh salad on the side to balance everything out.
I used the recipe on the back of the can.

Campbell's® Healthy Request® Chicken & Pasta Primavera
From: Campbell's Kitchen
Prep/Cook Time: 20 minutes
Serves: 4

Ingredients:
1 can Campbell's® Healthy Request® Condensed Cream of Mushroom Soup
1/2 cup milk (I used Simply Smart Fat-Free
3 tbsp. grated Parmesan cheese
1/4 tsp. garlic powder
1 bag (16 oz.) frozen vegetable combination; broccoli, cauliflower, carrots (I used leftover roasted veggies)
2 cups cubed cooked chicken (I used leftover rotisserie chicken breast)
4 cups hot cooked spaghetti, cooked without salt (I used whole wheat penne)

Directions:
MIX soup, milk, cheese, garlic powder and vegetables in saucepan. Heat to a boil. Cover and cook over low heat 10 min. or until tender-crisp.
ADD chicken and heat through. Serve over spaghetti.

Nutrition Information
Calories 461, Total Fat 7g, Saturated Fat 3g, Cholesterol 68mg, Sodium 474mg, Total Carbohydrate 63g, Dietary Fiber 8g, Protein 35g, Vitamin A 117%DV, Vitamin C 20%DV, Calcium 20%DV, Iron 21%DV

So, yes there is still quite a bit of sodium in each serving, but much less than the original cream of mushroom condensed soup. Once in a while, I think it's fine, but I would'nt eat this too often. I'm going to try to stick to the fresh stuff unless I have no time!

How often do you use condensed soup in your recipes?

Tuesday, September 12, 2006

More Cup Cakes...If At First You Don't Succeed...

Try, Try Again!

If you read my post on the Lemon Cupcakes with Chocolate Frosting and Lemon Glaze, than you know how disappointed I was in the final product-(due to the funky canola oil). Well, in the spirit of determination and still trying to clean out my pantry closet, I made more cup cakes using another boxed cake mix.

I haven't been to the grocery store to purchase more oil yet, so I ended up using applesauce in place of the oil. What a difference! These Cupcakes were absolutely delicious (if I do say so myself).

I used Duncan Hines Marble Cake Mix.
In my recipe, I replaced 1/3 cup of oil with 1/2 cup of unsweetened applesauce. Instead of 3 eggs, I used one egg and two egg whites. I also added a little more than a Tablespoon of fat-free buttermilk and a 1/2 cup of Butterscotch Chips to the mix.

The Cupcakes seemed to be going a low-fat direction, that is until I added the Butterscotch Chips and the frosting.

I don't normally use Butterscotch Chips too often, but I had a bag and figured I would try something a little different. I am so glad I did. What a great combination. I never thought I liked Butterscotch Chips too much, but I guess I was wrong because they made the difference in these Cupcakes. They went from ordinary to extraordinary.

Once the Cupakes were baked and cooled I had to decide on a frosting. So I tasted a plain cup cake and immediately knew I had to make a frosting with the Butterscotch Chips.

This what I came up with:

Butterscotch Frosting

1/2 cup of Butterscotch Chips
1/4 cup of Smart Balance Light Buttery Spread
1 Tablespoon of Milk
1/2 teaspoon Vanilla
1 1/2 cups Powered Sugar, plus more if needed

Melt the Butterscotch Chips in the microwave in a medium microwave safe bowl on 70% for about 45 seconds to 1 minute. Stir in the spread, and 1/3 of the sugar. Add 1 teaspoon of milk and more sugar. Mix in the rest of the milk and sugar and stir in the vanilla. Stir until you get the perfect consistency, adding more sugar if necessary.

Spread over the Cupcakes and sprinkle the top with Chocolate Shavings.

Do You Use Butterscotch Chips often in baking cakes, cookies, brownies, etc.?

Lactose-Free Chocolate Chip Cookies

Just as yummy as the original!

I made these cookies about a month ago and forgot to post them. They are pretty much a basic cookie recipe just altered a bit to cater to people with a sensitivity to lactose and/or whey.

It was my sister's birthday in August and I made a large batch of Dark Chocolate M & M Cookies for her. I found the recipe at Culinary in the Country. I reserved about a third of the dough, (excluding the Dark Chocolate M & M's) to make these for my brother-in-law who is lactose intolerant.

The reason I forgot to post is that I froze them after baking and forgot all about taking them out on the day of her birthday. So I guess you can say I found a nice treat for myself in the freezer!
I love it when that happens :)

Here is the recipe with the changes I made:

Lactose-Free Chocolate Chip Cookies


3/4 cup Fleischmann's unsalted margarine
1 cup packed brown sugar
1/2 cup white sugar
1 tablespoon pure vanilla extract
1 large egg plus 1 egg yolk
2 cups all-purpose flour
1/2 teaspoon baking soda
1/2 teaspoon salt
1 1/2 cups Sam's Club Chocolate Chips (they contain no milk derivitives)

In a small saucepan, melt margarine over medium-low until it smells very nutty and gets a light golden color. Let cool slightly.

In a large mixing bowl, cream together melted margarine and sugars. Beat in vanilla, egg and egg yolk until the color lightens and is thoroughly mixed.

In a medium bowl, whisk together flour, baking soda and salt. Pour dry mixture into the wet and use a large wooden spoon to stir together just until combined. Fold in the Chocolate Chips. Cover and place in the refrigerator for at least 2-3 hours.

Preheat oven to 325

Scoop out dough using a 1/4 cup measure and place on parchment lined baking sheets. These spread a little so I only placed 6 per baking sheet. Bake for 15-18 minutes, turning the baking sheet halfway through. The edges should be slightly golden with the center being puffy and a little undercooked. Remove and let cool on the baking sheets for about 5 minutes. Carefully place each cookie on a wire rack to cool completely.
Makes 18-20 large cookies


How Often Do You Make Cookies From Scratch?

Monday, September 11, 2006

So Close But Yet So Far...

These Cupcakes Could Have Been Great!

I decided to clean out my pantry closet and use some of the boxed cake and muffin mixes that have been accumulating. This one was Betty Crocker Lemon Cake.

For some reason it triggered a memory of Chocolate Lemonaire Doughnuts. I used to eat them every now and then at Dunkin Donuts and they were one of my favorites. It is a doughnut filled with lemon custard and frosted with chocolate glaze. I immediately knew this would be my inspiration for the Lemon Cake mix.

Since I had buttermilk in the fridge, I wanted to try using it in the cake mix for something a little different. I looked on the Betty Crocker website for a recipe using buttermilk and found one for Lemon Cake With Raspberry Mouse. It sounded great but I wanted to go with the Chocolate Lemon combo, so I adapted it to what I had on hand.

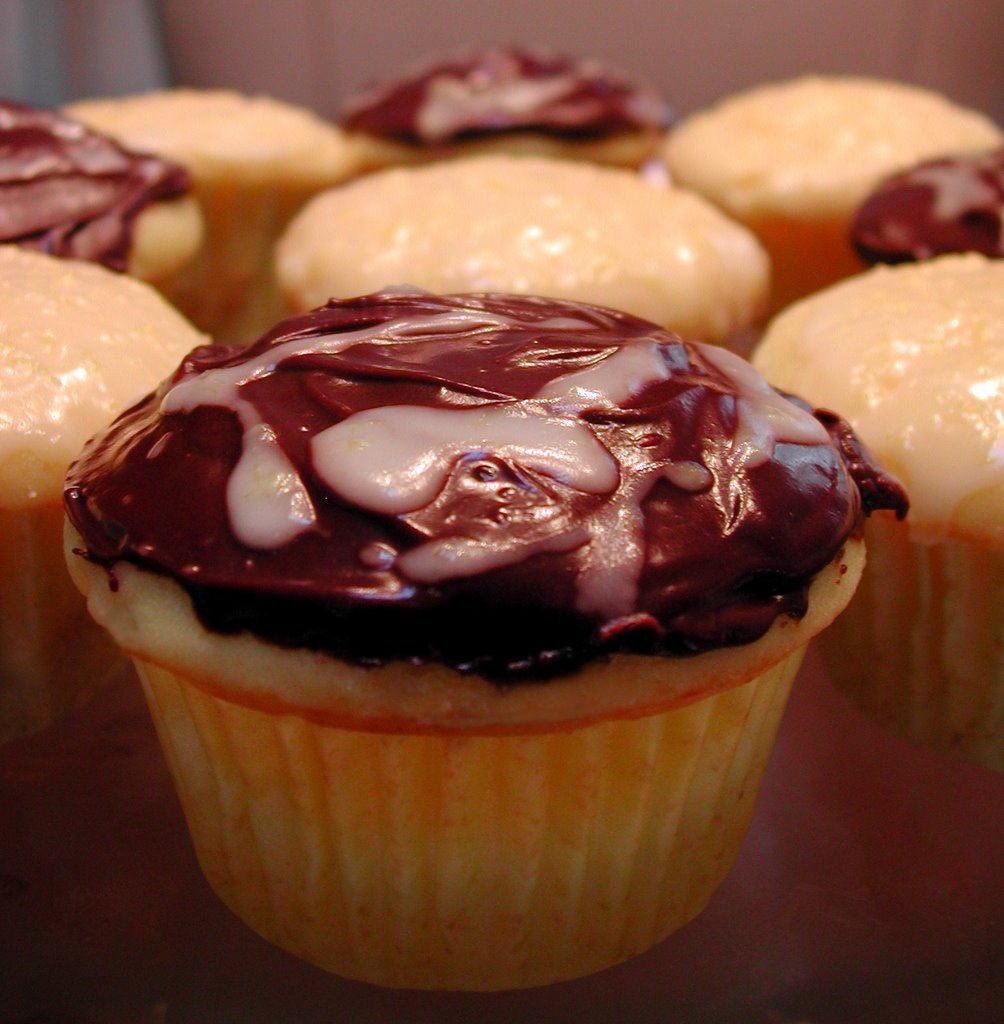
So I know your wondering why the cupcakes "COULD" HAVE BEEN GREAT. Well, I think the canola oil I used was starting to go bad. It had a strong smell when I was measuring it, but I just thought I was imagining it. The final product was perfect other than the funky after taste of oil. The cake came out very moist and rose to perfection. The frosting was awesome. Doesn't it figure?

I will make this recipe again when I get some new oil! So try it, it will be awesome if you use fresh oil.

Lemon Cupcakes with Chocolate Frosting and Lemon Glaze
Adapted from Betty Crocker Lemon Cake with Rapsberry Mouse

1 box Betty Crocker® SuperMoist® lemon cake mix
1 1/3 cups buttermilk
1/3 cup vegetable oil
1 teaspoon grated lemon peel
3 eggs

1 . Heat oven to 350°F. Grease bottoms only of two 8-inch or 9-inch round cake pans with shortening or cooking spray.
2 . In large bowl, beat cake mix, buttermilk, oil, lemon peel and eggs with electric mixer on low speed 30 seconds. Beat on medium speed 2 minutes, scraping bowl occasionally. Pour into pans.
3 . Bake Cupcakes 16 to 21 minutes, 8-inch rounds 33 to 38 minutes, 9-inch rounds 28 to 33 minutes, or until toothpick inserted in center comes out clean. Cool 10 minutes. Run knife around side of pans to loosen cakes; remove from pans to cooling rack. Cool completely, about 1 hour.
4. Frost with "Perfectly Chocolate" Chocolate Frosting and drizzle with Lemon Glaze.

High Altitude (3500-6500 ft):
Heat oven to 375°F. Use 9-inch pans. Stir 1 tablespoon Gold Medal® all-purpose flour into dry cake mix. Decrease oil to 2 tablespoons. Bake 27 to 32 minutes.

"PERFECTLY CHOCOLATE" CHOCOLATE FROSTING

1 stick (1/2 cup) butter or margarine (I used Smart Balance Light Buttery Spread)
2/3 cup HERSHEY'S Cocoa
3 cups powdered sugar
1/3 cup milk
1 teaspoon vanilla extract

Melt butter (I just let the spread come to room temperature). Stir in cocoa. Alternately add powdered sugar and milk, beating to spreading consistency. Add small amount additional milk, if needed. Stir in vanilla. About 2 cups frosting.

Lemon Glaze

Zest from 1 lemon
Juice from 1 lemon
Confectioners Sugar

Mix all ingredients in a bowl, adding small amounts of confectioners sugar until desired consistency.

Have you ever heard of Chocolate Lemonaire Donuts? Do you like Chocolate and Lemon together?

Tuesday, September 05, 2006

Five Foods You Should Eat Before You Die!

I was recently tagged by Teddy from Fun With Your Food and Sara from i like to cook to participate in the Foodbloggers Guide to the Globe started by Melissa at The Traveler's Lunchbox.

It is to list 5 Things You've Eaten and Think that Everyone Should Eat
at least Once Before They Die.
I have actually been thinking about my response for days.

So here it goes:

1. Pizza. I think most of us have already tried pizza at least once in our lives but if there is anyone out there who has'nt, what are you waiting for? Start with the basic tomato sauce base, and top with cheese. Or my favorite: White Pizza with Spinach and Olives. The simplier, the better. And oh yeah, get it well done!

2. Dark chocolate. I can't live without it. I love all chocolate, but dark is my favorite and now that we know about the health benefits, I think everyone should be eating it daily!

3. Italian Antipasto. There is nothing more satisfying than sitting down with family and/or friends picking at an assortment of some of the best appetizers around. I'm talking about CHEESE-Parmigiano Reggiano, Fontina, Asiago, Pecorino Romano, Provolone, Mozzarella...I could go on but I'll stop here. Plus all types of Italian Cold Cuts-Prosciutto, Mortadella, Cappicola, Salami, Pepperoni, Soppresetta and more. Marianted Vegetables Galore-from all kinds of Olives, Peppers, Eggplant, Artichokes, Stuffed Tomatoes, and more.

4. Fresh Crusty Bread. You can't have an Antipasto or any respectable dinner for that matter without it. Whether it's a fresh Italian Loaf cut into thick slices, or even a French Baguette, either one will do. I could eat them just as they are, just tear off a piece and enjoy! The possibilies are endless...Must haves are: Crostini and Bruschetta with an array of different toppings or Garlic Bread(yum).

5. Cookies. This was a tough decision. I could have went with so many other choices: Ice Cream, Eggs, Belgian Waffles, Grilled Cheese, Chicken Parmigiano, just to name a few of my fav's. But I had to go with cookies because I'm a big fan of the crunch and the chew. Cookies always satisfy those two requirements. I go with Biscotti when I'm looking for a crunchy snack, and nothing goes better with Coffee, especially Cappuccino or even Tea better than Biscotti. When I'm craving something with a little bit of chewiness, I go with either Chocolate Chip or Oatmeal Raisin Cookies. But I have to say, I have'nt met a cookie I did'nt like!

Now it's your turn...

Jen at Casual Slack
Paula from The Cookbook Junkie
Doodles from Peanut Butter Etouffee
Cate from Sweetnicks
Kim from Artfully Yours

Monday, September 04, 2006

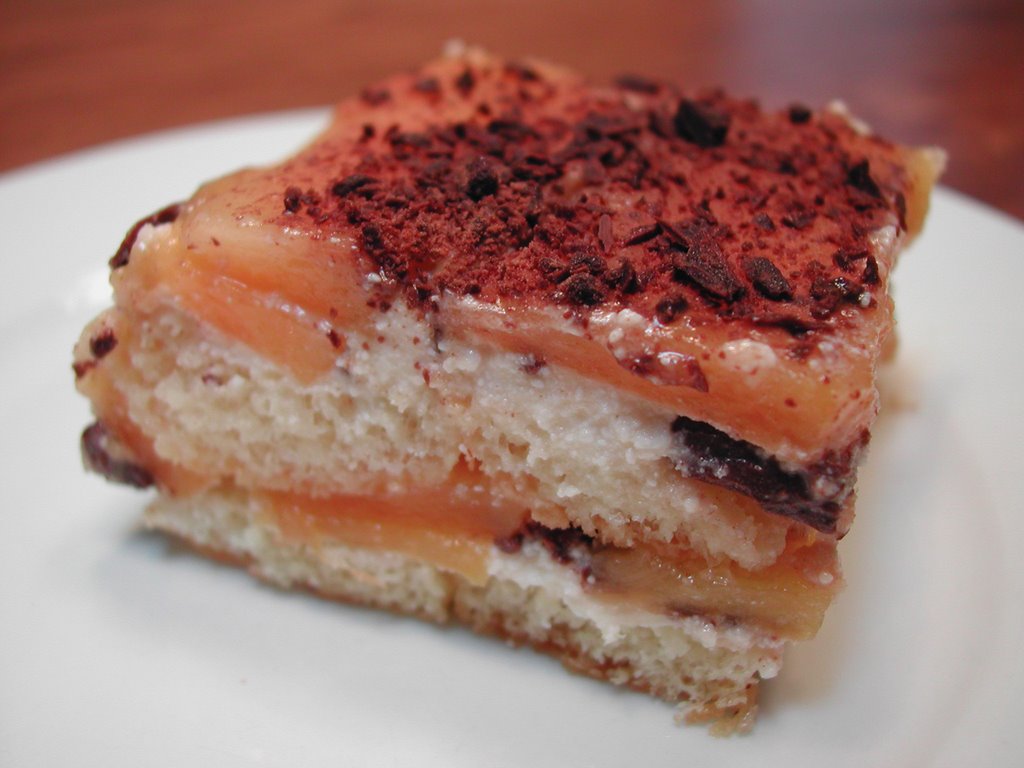
Layered Peach & Ricotta Squares

A Peachy Spin on Tiramisu!

What inspired me to create this dessert? I had peaches and ricotta in the fridge and wanted to use them up before they went bad. What can I say, my frugal side often prompts me to come up with great ideas.

I searched the internet for desserts using these two ingredients and did'nt find many. I found some great recipes for one or the other that I saved, but nothing great using both together.
Layered Peach Sqares
from the Magazine of La Cucina Italiana was the recipe that finally inspired me. It did'nt use any cheese, just layers of peaches, chocolate and lady fingers brushed with Maraschino Liqueur. Since I love Amaretto, I used that, instead.

The original recipe also had an interesting sauce that I did'nt make, but I would have, if I had the ingredients on hand. I will include it in case you would like to try it.

Layered Peach & Ricotta Squares
Adapted from the Magazine of La Cucina Italiana, July/Aug. 2004

2 T butter, plus extra
4 Peaches, ripe but still firm, pitted and thinly sliced
2 T sugar
2 ounces of bittersweet chocolate, finely chopped
28 Lady Fingers
3 T Amaretto, divided
16 ounces Part-skim Ricotta
1/4 cup Sugar
1 teaspoon Vanilla
Zest of one Lemon

In a skillet over medium heat, add the butter and peaches, and saute for 2 minutes. Stir in the sugar and 1 tablespoon of Amaretto, saute for another 2 minutes, and set aside to cool.

In a small bowl mix the ricotta, sugar, vanilla and lemon zest. Set aside.

Line an 8 inch square baking dish with a piece of buttered parchment paper. Layer the bottom with half of the peaches and sprinkle with a third of the chocolate. Spread half of the ricotta mixture over the peaches. Arrange 14 Lady Fingers on top, trimming the ends of the cookies if necessary to fill up any space.

In a bowl, dilute 2 tablespoons of Amaretto with 1 tablespoon of water and brush onto the cookie layer.

Add another layer of peaches, sprinkle with half of the remaining chocolate and the rest of the ricotta mixture. Finish with a layer of remaining Lady Fingers and moisten with the Amaretto. Refrigerate for at least 30 minutes.

Tip the cake onto a serving plate, peel off parchment paper, sprinkle with remaining chocolate or and slice the cake into equal parts using a serated knife. Serves 12.

Amaretto Caramel Sauce
Original Topping in recipe

3 Amaretto cookies
2 T rum
4 T pre-made caramel, divided

In a food processor combine the cookies, rum and caramel. Process to the consistency of a smooth sauce. Spoon on the side of each slice of cake.

My peaches were still a little crunchy after sauting them. I think I would cook them a little longer if I made it again. Of course it depends on the ripeness of the fruit too. Lately the peaches and nectarines that I've bought have'nt been all that ripe. I hate it when that happens.

How has the fruit in your area been this summer?
What is the best way to ripen a peach?

PRETTY (sharp) IN PINK!

I got a new knife!

I know what you're thinking. PINK? I know, but I did'nt buy it for the color. And don't let the color fool you. It's very sharp.

I can finally cut raw meat (in my case, mostly chicken) with ease. I don't know what took me so long to buy a sharp knife. I have been struggling for years, trying to trim fat, cut thin slices of meat, filet and butterfly. I guess I just thought it was supposed to be difficult. But now it's so easy. Actually almost too easy. The first time I used it, I nearly cut my finger off. The knife just cut so easily through my skin, I did'nt even feel it.

It is a Pure-Komachi... It's high carbon stainless steel and made in Japan. I paid $24.99
at a specialty cutlery shop. You can also order online from their website. So why did I choose this one? I just asked the shop owner for the cheapest, but sharpest knife available.

All I can say is I'm happy with it. So what if it's pink. Actually, it's kind of growing on me.